
Introduction
Welcome to this mini-tutorial series where I go over some of the basics parameters to create realistic Glass in Vray. I’ll be using v-ray next for SketchUp (4.1), however any version after Vray 3.6 can be used to achieve similar results.
You can download the sketch up studio file and create your own materials as you follow the tutorial.
Material Setup
For this exercise, I have a very simple studio set up with few geometric shapes to help display the Vray Material. The lighting set up is extremely simple. I’m only using an HDRI to affect the reflections and using Environment GI for soft lighting. The render setting is kept at default to benefit the results of this exercise.
As for the Glass panel, Its 1/2” thick 12 x 8.5”. It’s important that all the front surface is facing outward (back surface facing inward) to help avoid some issues when using refraction.


Let’s get started.
Create a new Generic Material (Vray BRDF), Give it an appropriate and let’s apply to our glass panel.
1. Clear Glass
Diffuse Parameters
Diffuse Color effects the color of the surface, this parameter is also affected by reflection and refraction. Lets set Diffuse Color to Black as its commonly used when creating glass materials. Let’s leave everything else as is.
Reflection Parameters
Reflection affects the visual reflectivity of your material. White color (255, 255, 255) means 100% reflective like a mirror and Black (0,0,0) means no reflection. Lets set reflection color to white to ensure the reflection is completely visible. Using a color here can actually tint your reflection in an artificial way and result in a unique look.
Check the Fresnel option. Most material with reflection follows the fresnel rule, so It’s important to keep the Fresnel option checked that way your reflection is base on the angle of view.
IOR or index of refraction affects how light refracts as it passes through an object. Let’s keep the IOR value as is (Glass IOR usually between 1.4 to 2.0) so default parameters work well for this exercise. if you want to get into more specific details about IOR values, be sure to reference a proper table.
Refraction Parameters
Similarly, refraction affects the visual refraction of your material. White (255, 255, 255) is 100% refractive while black (0,0,0) 0% refractive. Lets set Refraction color white while keeping a mutual IOR value between Refraction and Reflection. Let’s leave all other parameters as is.
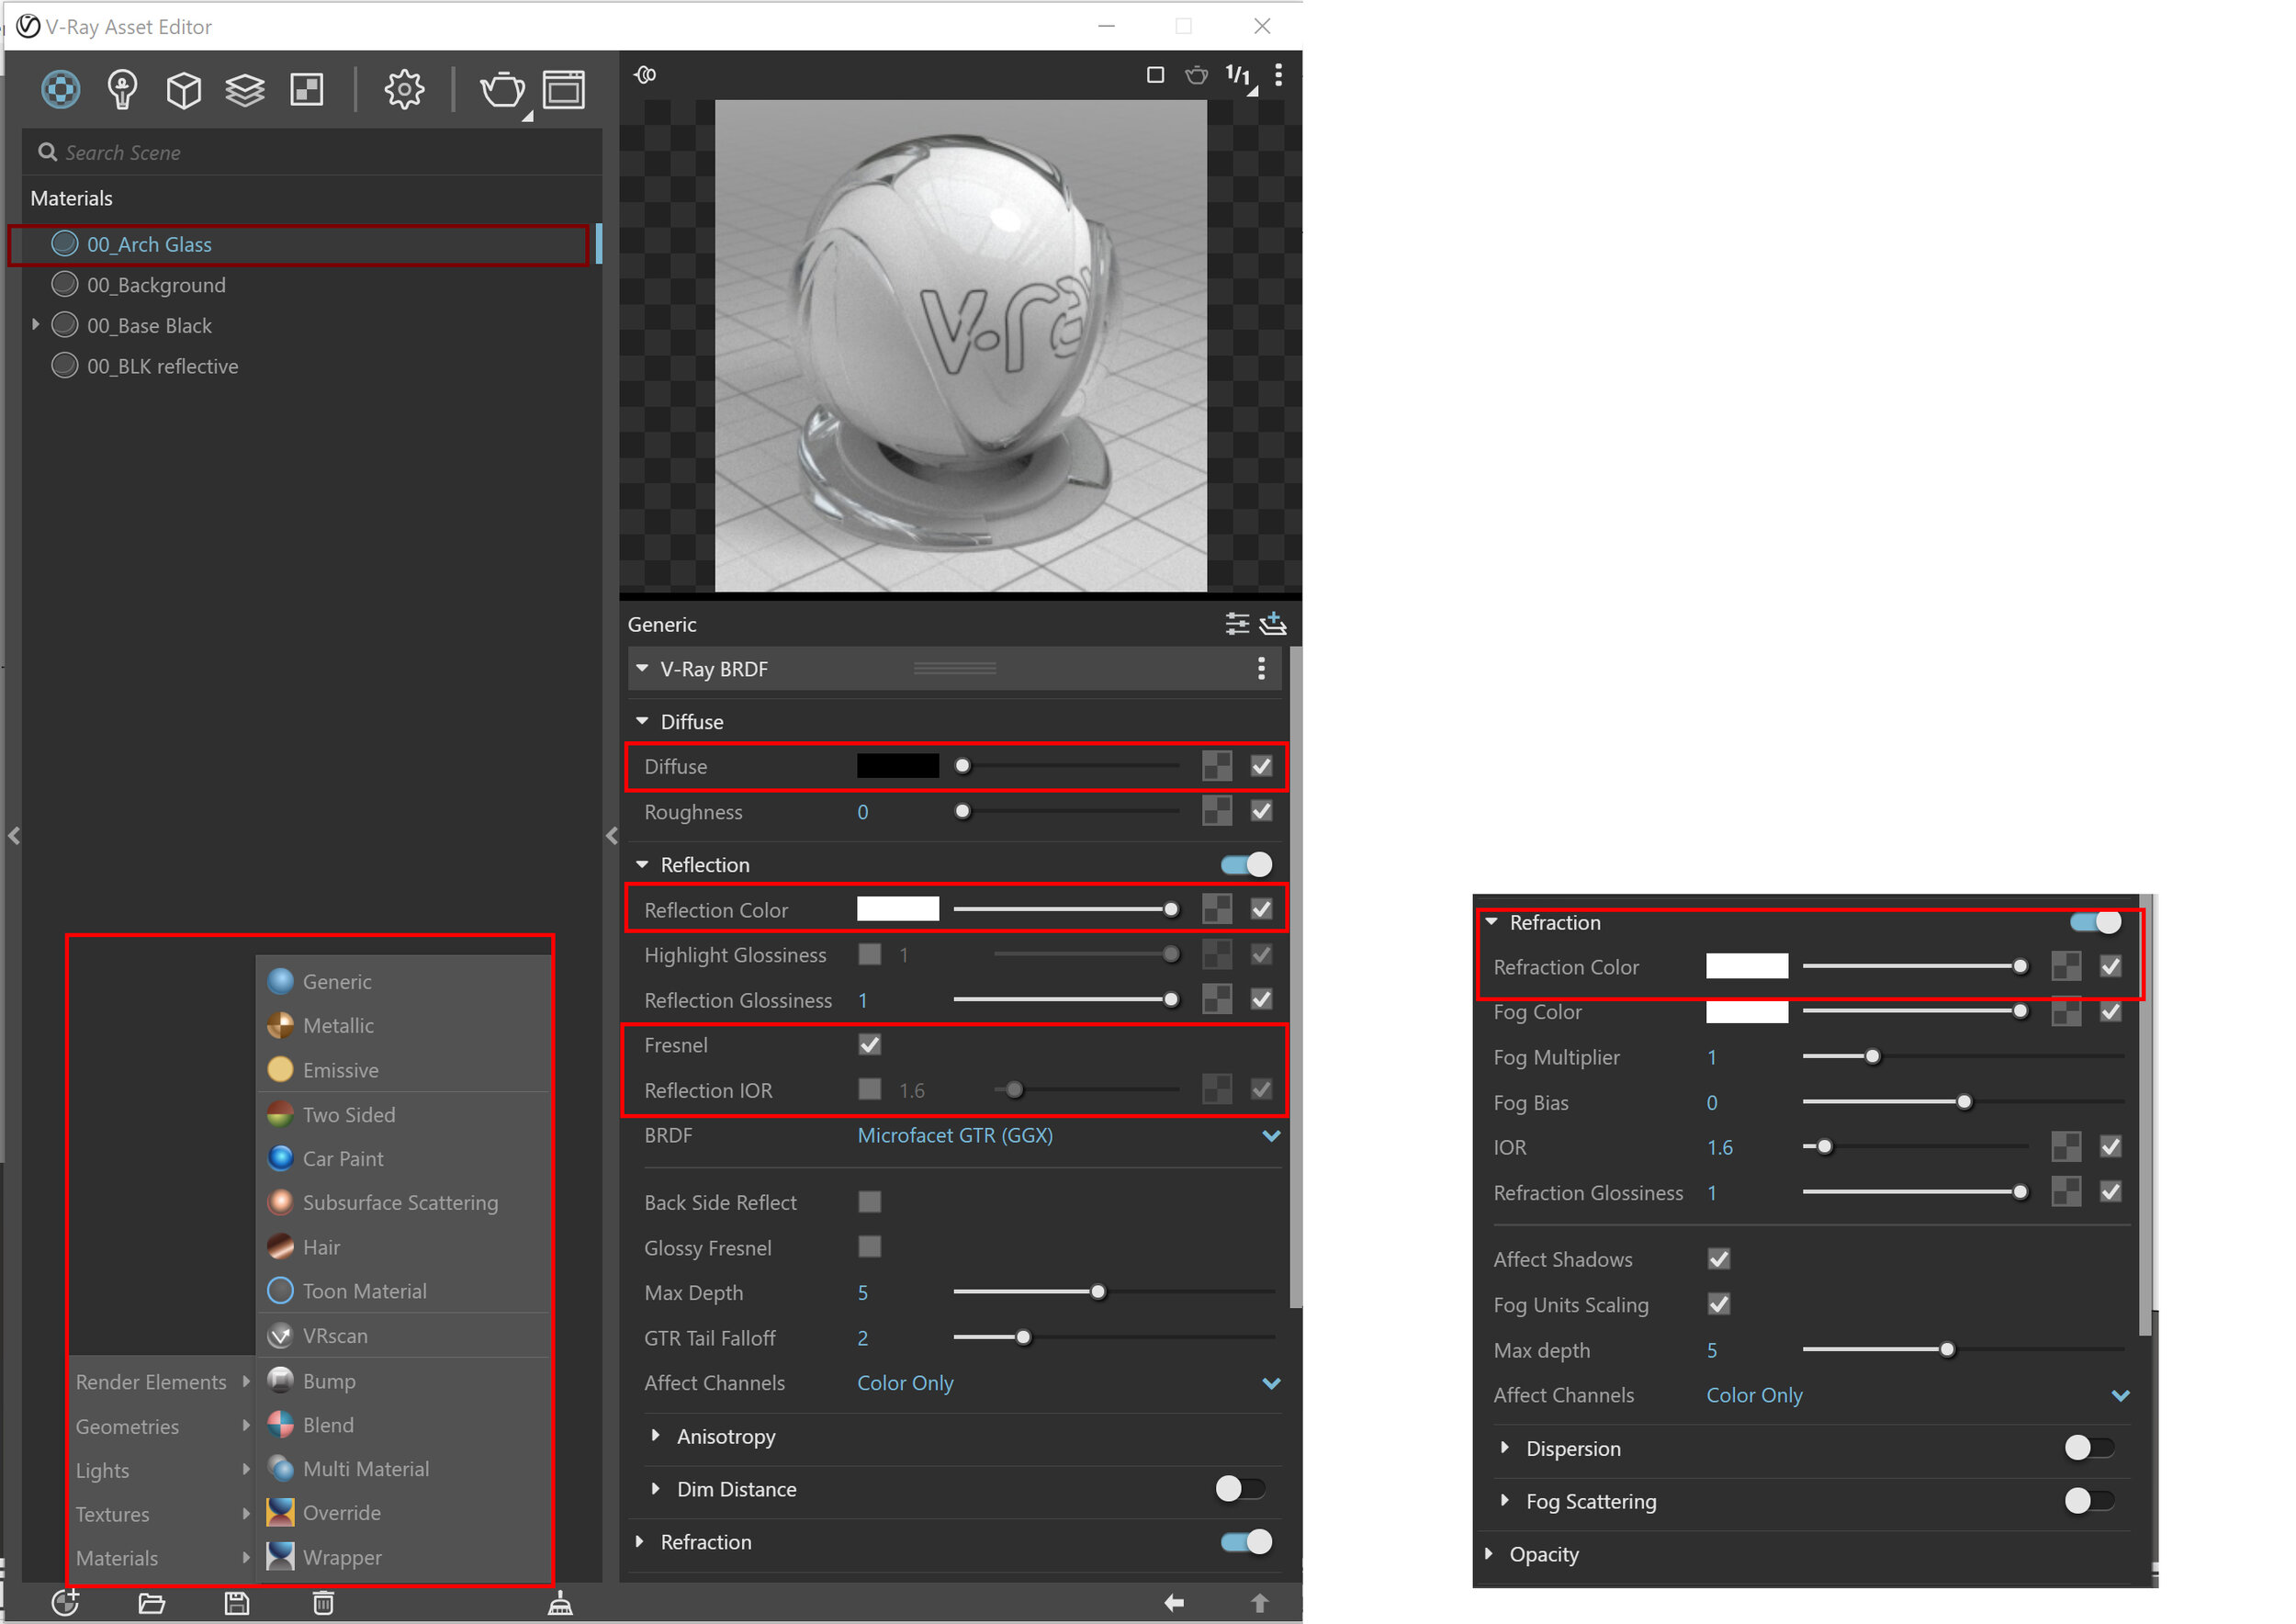
After adjusting the settings, your material preview should look like the example below.
Here are the results for clear Glass.

Clear Glass Material and Specular reflection showing reflection results.
The specular channels above shows the results of the reflection. You can always adjust the strength of your reflection by adjusting the reflection IOR value for a more unique look.
2. Tinted Glass
Its time to add color to the composition. For a tinted glass, let’s add a color into Fog Color Swatch and adjust the Fog multiplier under the refraction tab.

Use the Fog color and fog multiplier to add tinted effect.
A few things to keep in mind when using Fog Color; effect of the fog color differs based on the thickness of your panel. The thicker the panel, the deeper the color will appear to be (as shown in the example below).
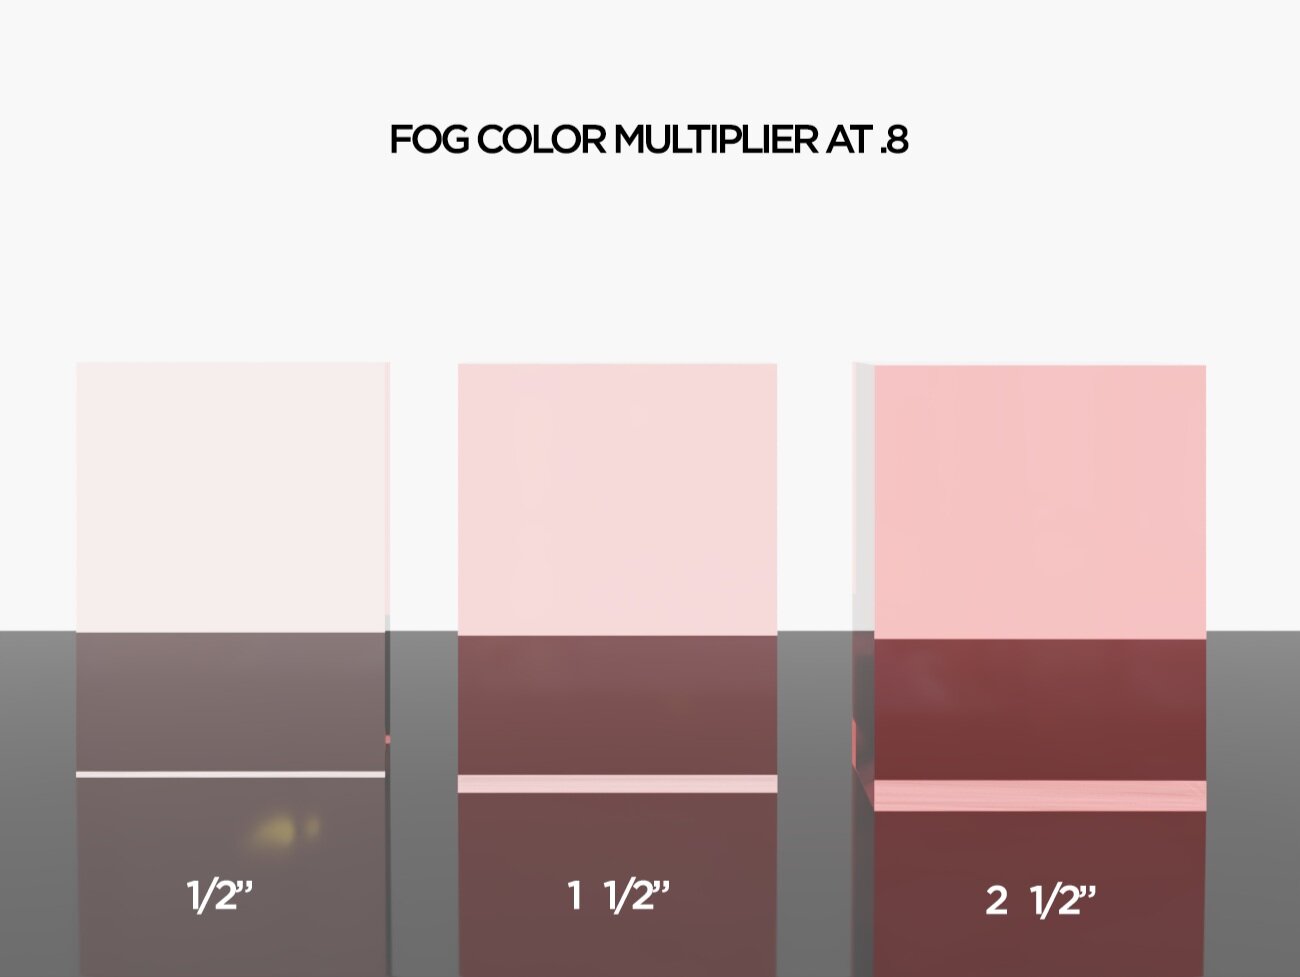
You can see how the refraction color is deeper with larger thickness.
Use a combination of light colors and the fog multiplier to control the strength of this effect
After a few trial and errors, for a 1/2 inch panel, these are the results I achieved.


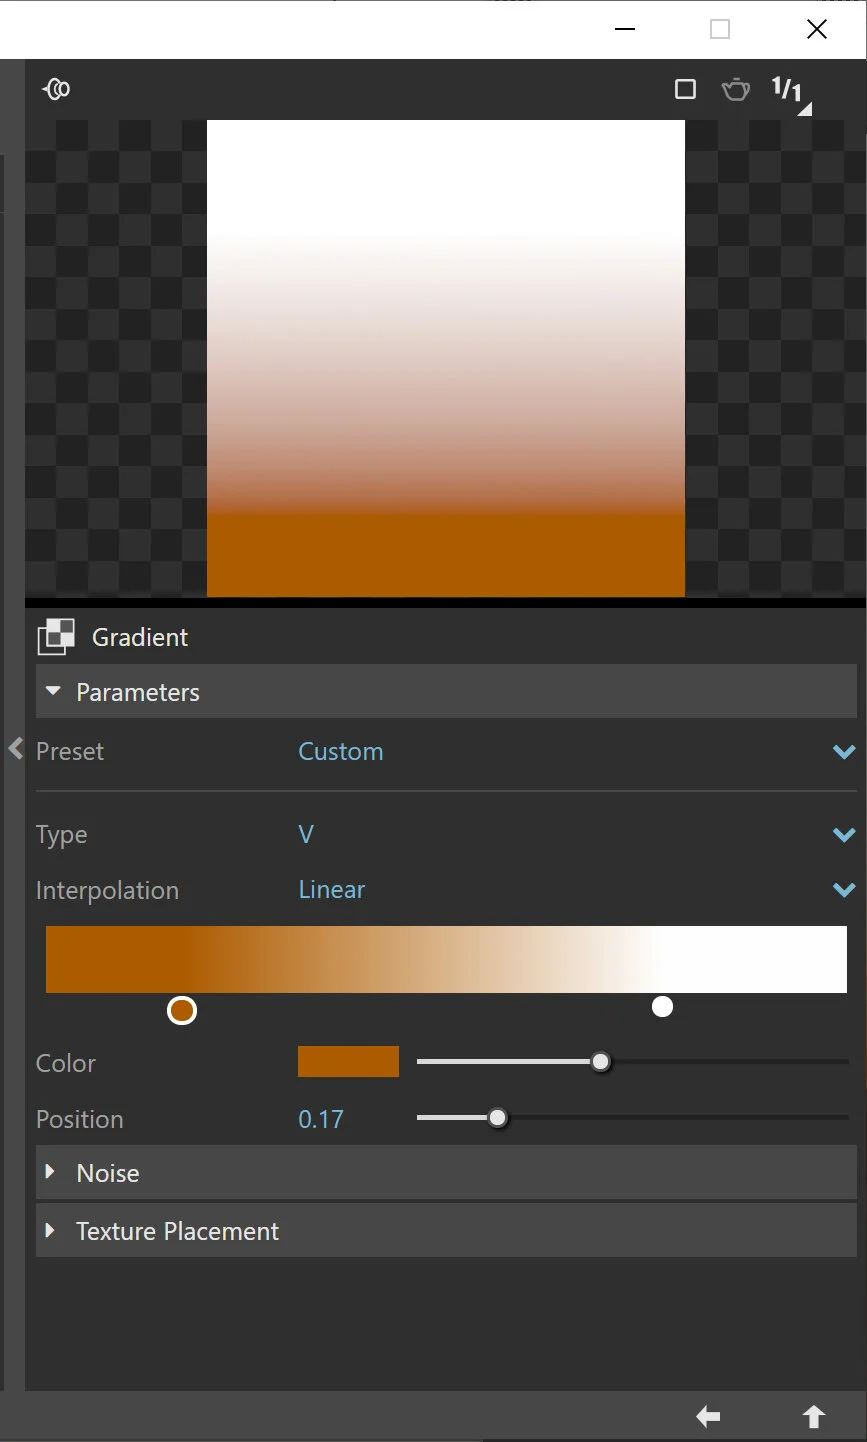
3. Gradient Glass
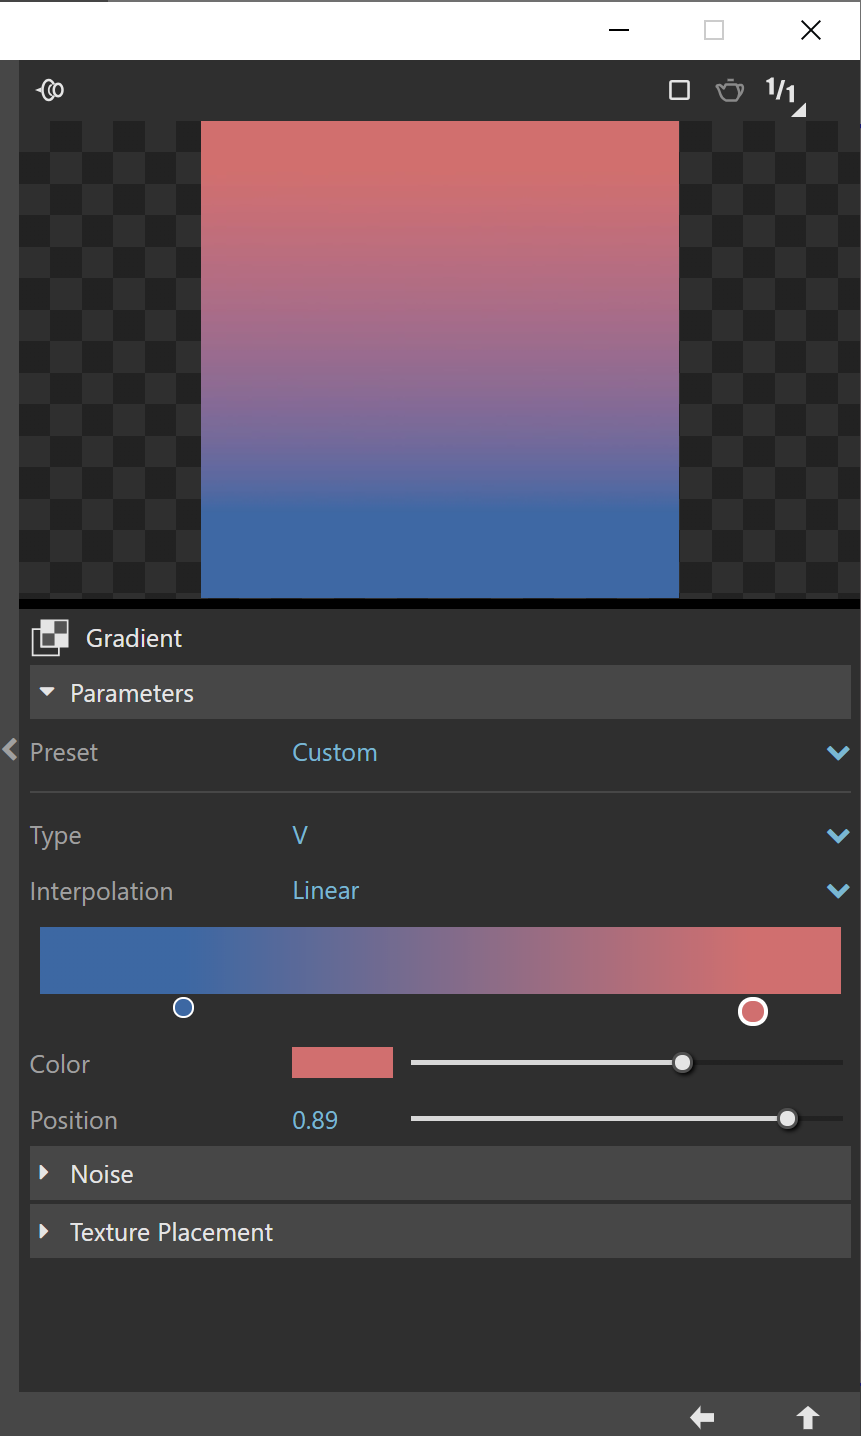
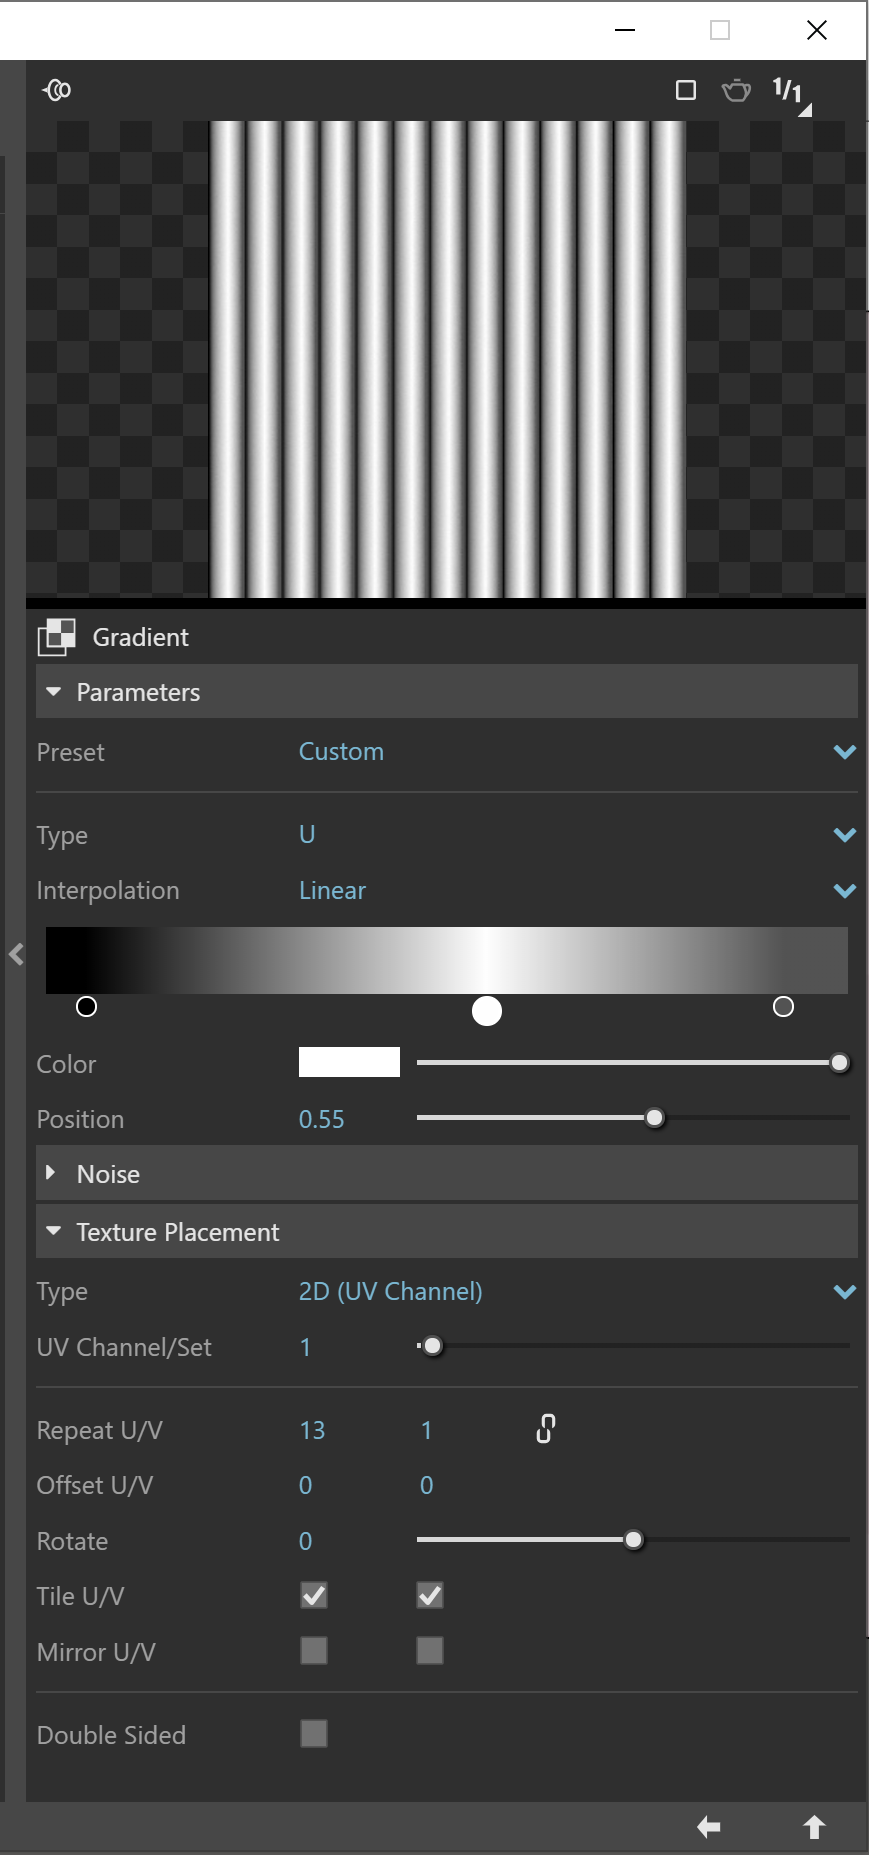
For this effect we simply want the Glass refraction to transition from Tinted to Clear (or from one color to another). Since we are using Fog Color parameter to add color to our material, Let’s use the Fog color texture slot and use the Gradient Mapping to create this effect.


Before we continue, Lets also set the Binding option for this material. Since we are not using a diffuse texture we will need the Vray texture helper to make sure the material renders correctly.
Expand your material binding options and under the texture mode options select “Texture Helper”. In case the Vray texture helper is visible but transparent, You can adjust the opacity in the SketchUp Material Editor (set it to 100%).


Finally, we need to map the Vray Texture Helper properly on our glass panel, let’s use Vray Utility Tools and apply Tri-Planar projection on the Glass Panel. This depends on your end result so only use if needed.

Here are some of the results of a single color Gradient Glass.


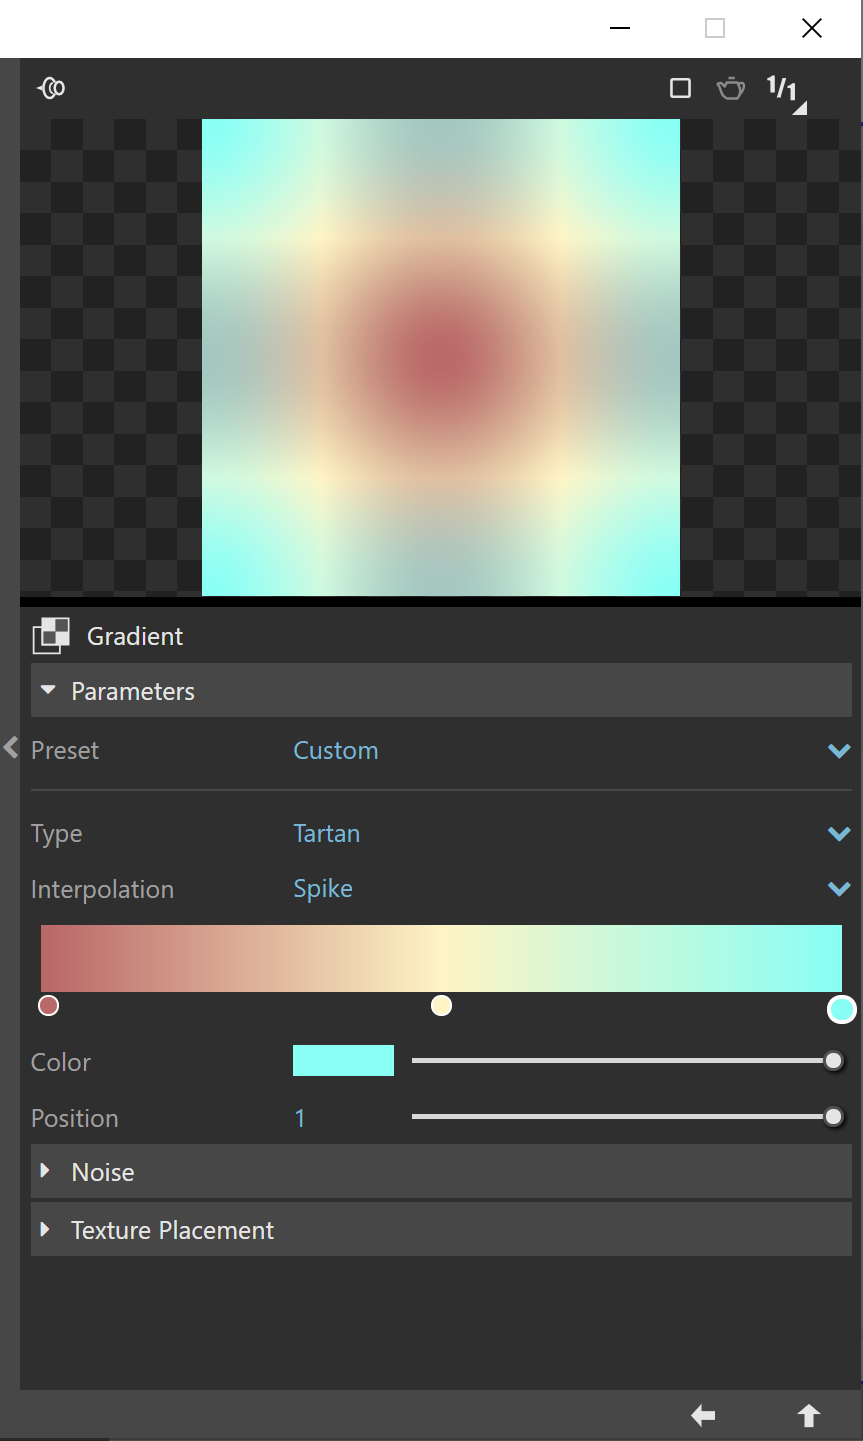
Here are some results and their settings using two or more colors.
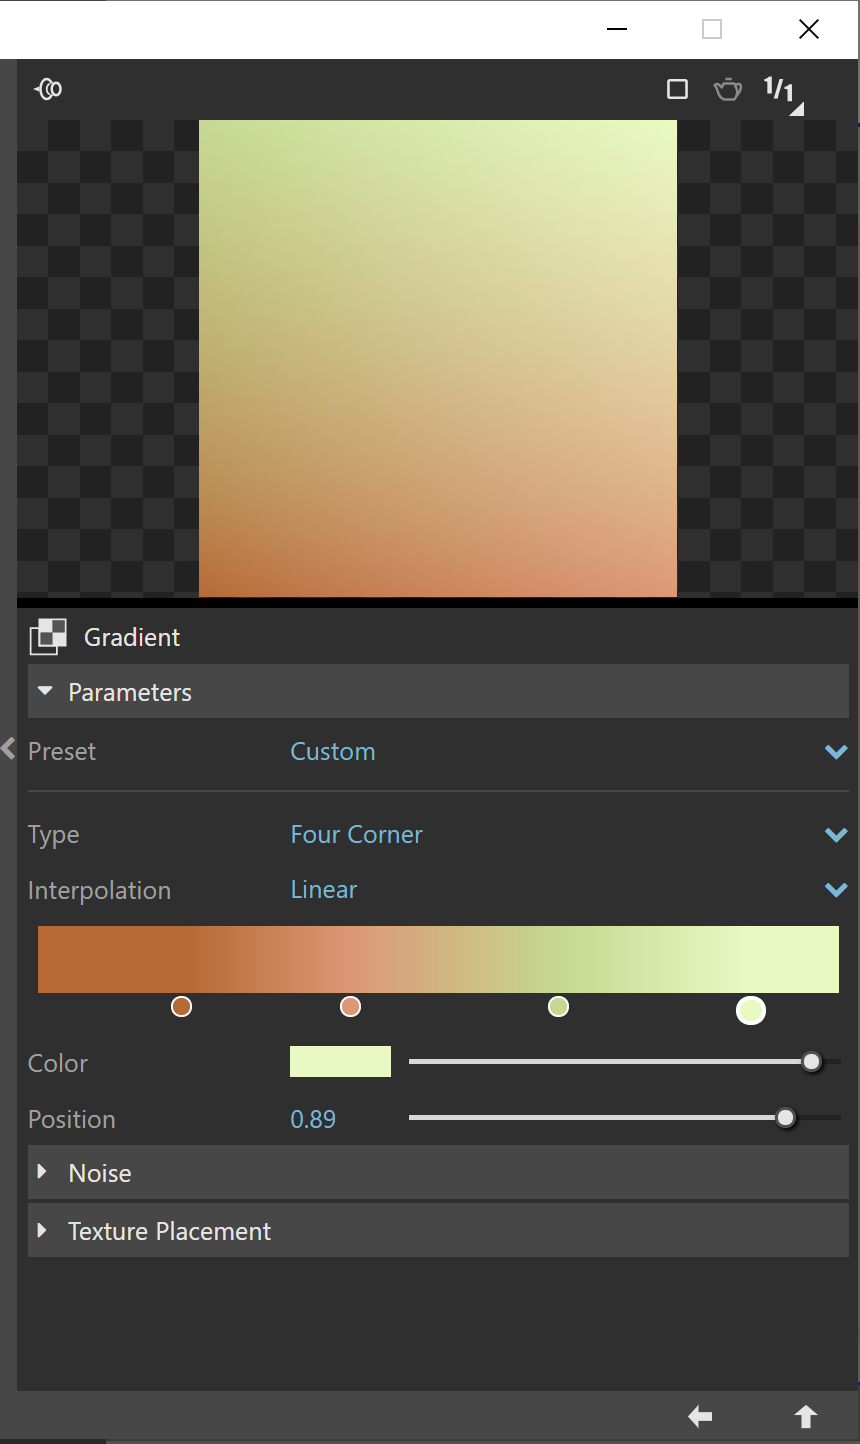


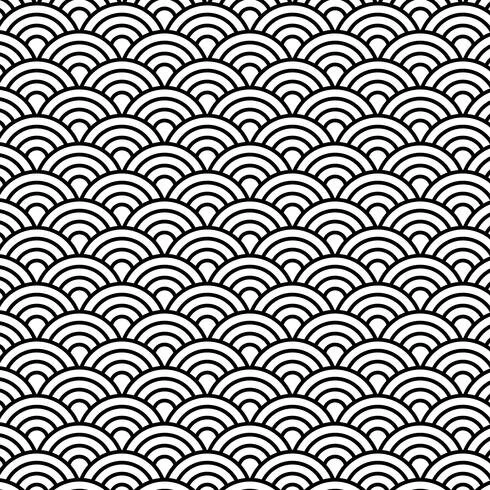
You can also use a Texture for a more unique look. Keep in mind that a white color (255, 255, 255) is clear. Adjust the Fog color multiplier as needed.


4. Frosted Glass
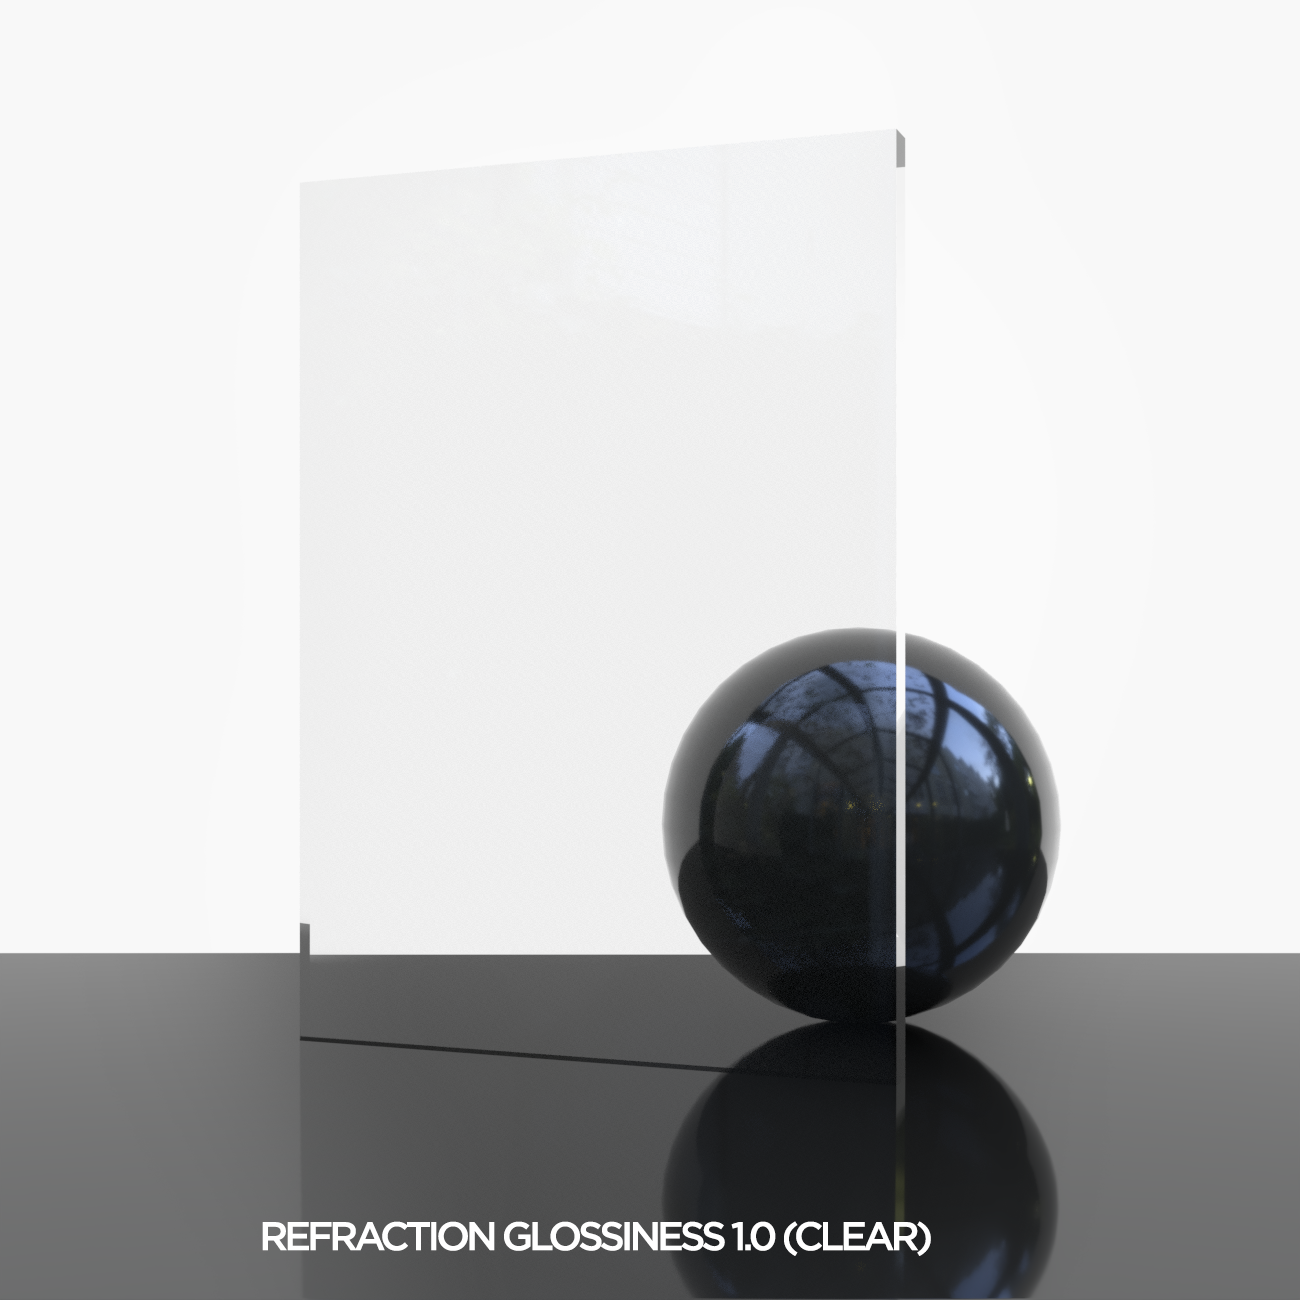
We can also create frosted glass by adjusting the Refraction Glossiness under Refraction Tab. This parameter allows you to controls the sharpness of your refractions. A max value of 1 will keep your refraction sharp, while a lower value will result in blurry refraction. Decreasing this value can increase render time, however, values between 0.8 to 1.0 seem to work perfectly.
Here are some different Refraction Glossiness values starting with 1.0 for sharp results down to .75 for a frosty effect.


Here are some more results using all the tips mentioned so far. You can also add a bit of texture to surface by using a Bump Map.


5. Textured Glass
Amongst all the glass types, Textured glass is the most visually interesting to me. For this glass type you can use both bump or normal map to add geometric effects to the glass surface.
Bump Map create the illusion of depth through light and shadow without effect the geometry (usually Grey scaled Bitmaps or Procedural Textures). Normal Maps have color information that impacts every pixel. The red, green, and blue channels of the image are used to control the direction of each pixel so you get more detailed results. For this lesson, I'll use the procedural textures and I’ll discuss Normal maps in a later post.
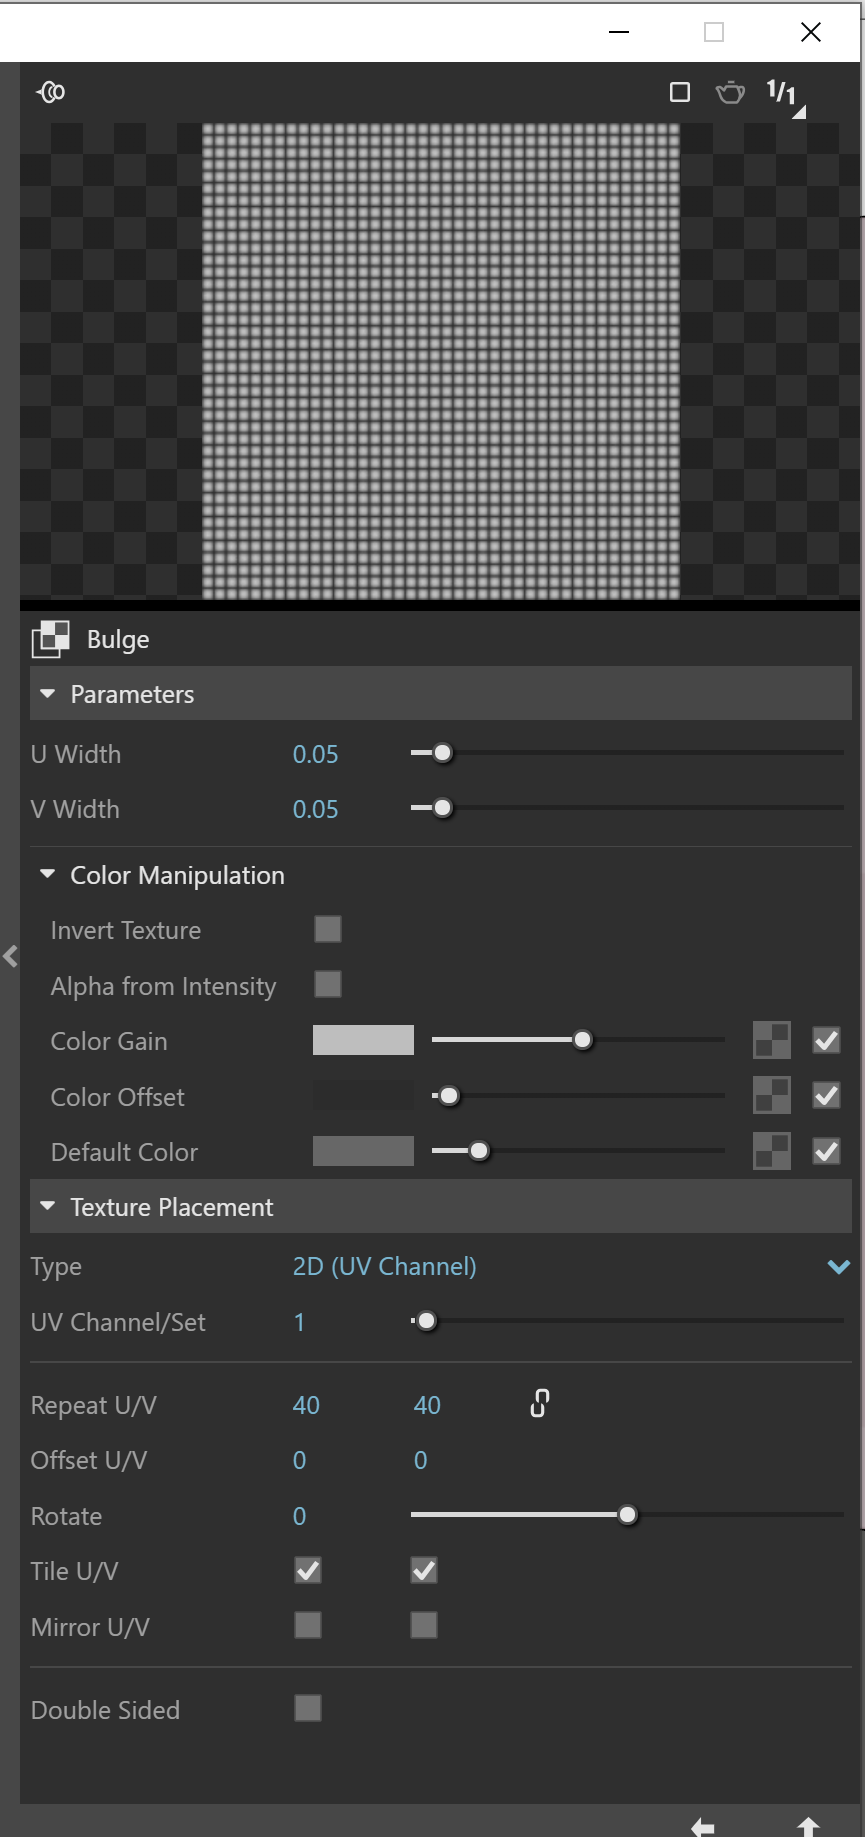
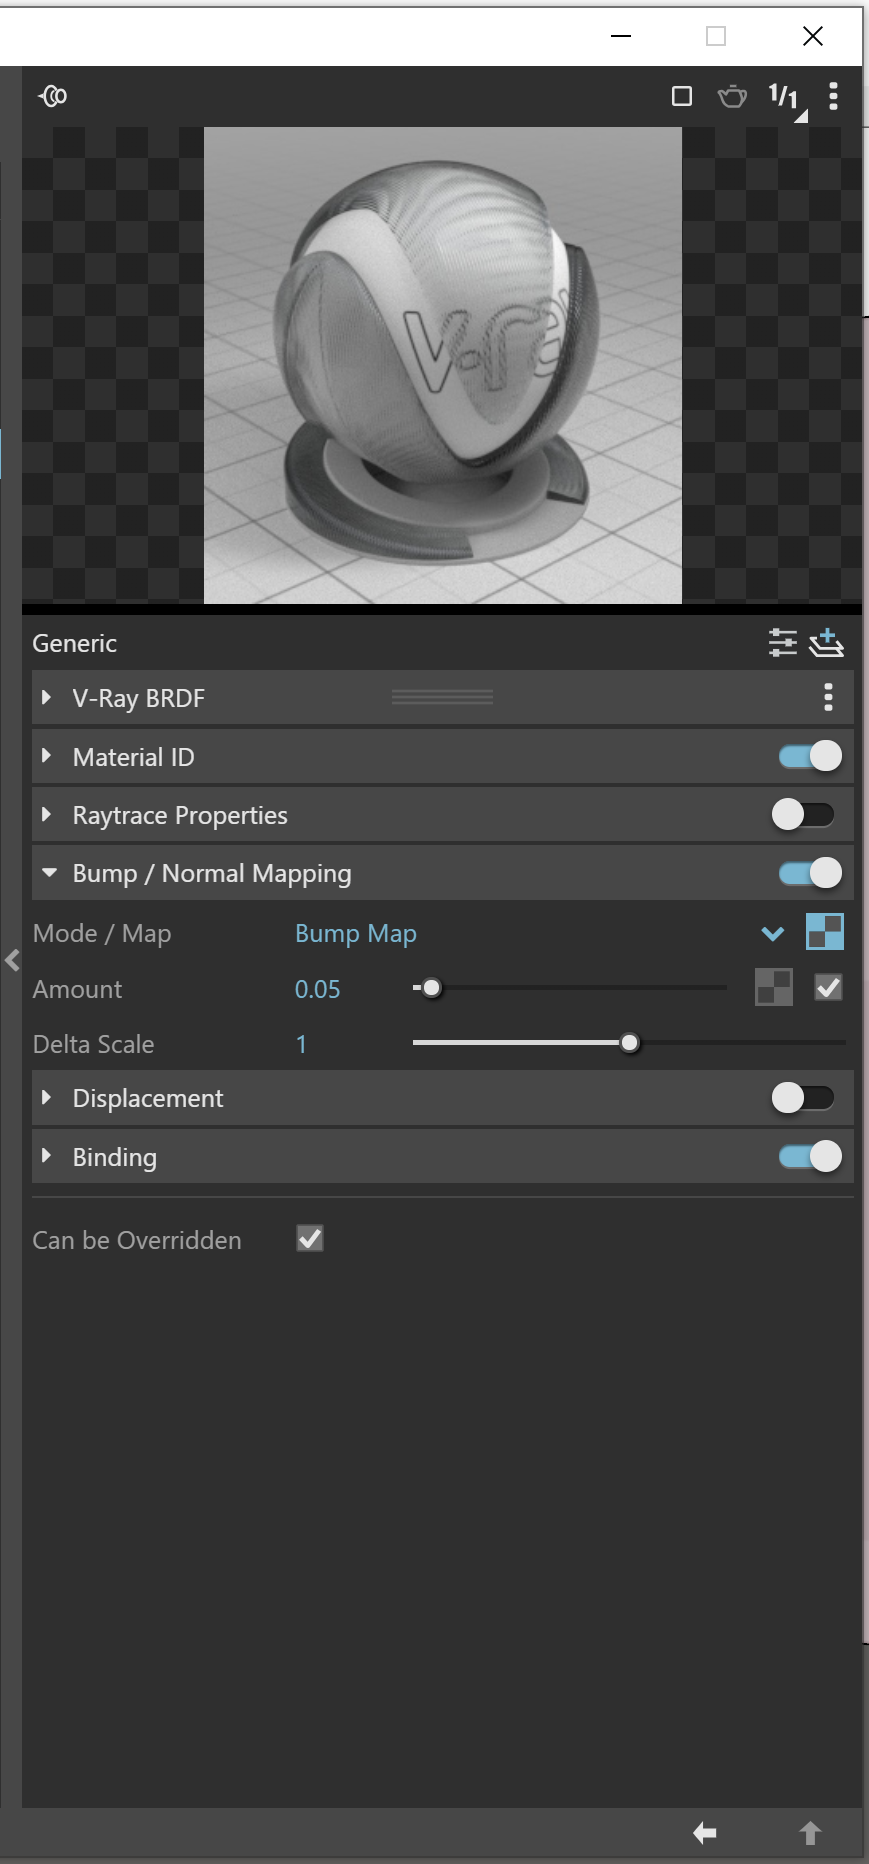
Adding Bump Mapp
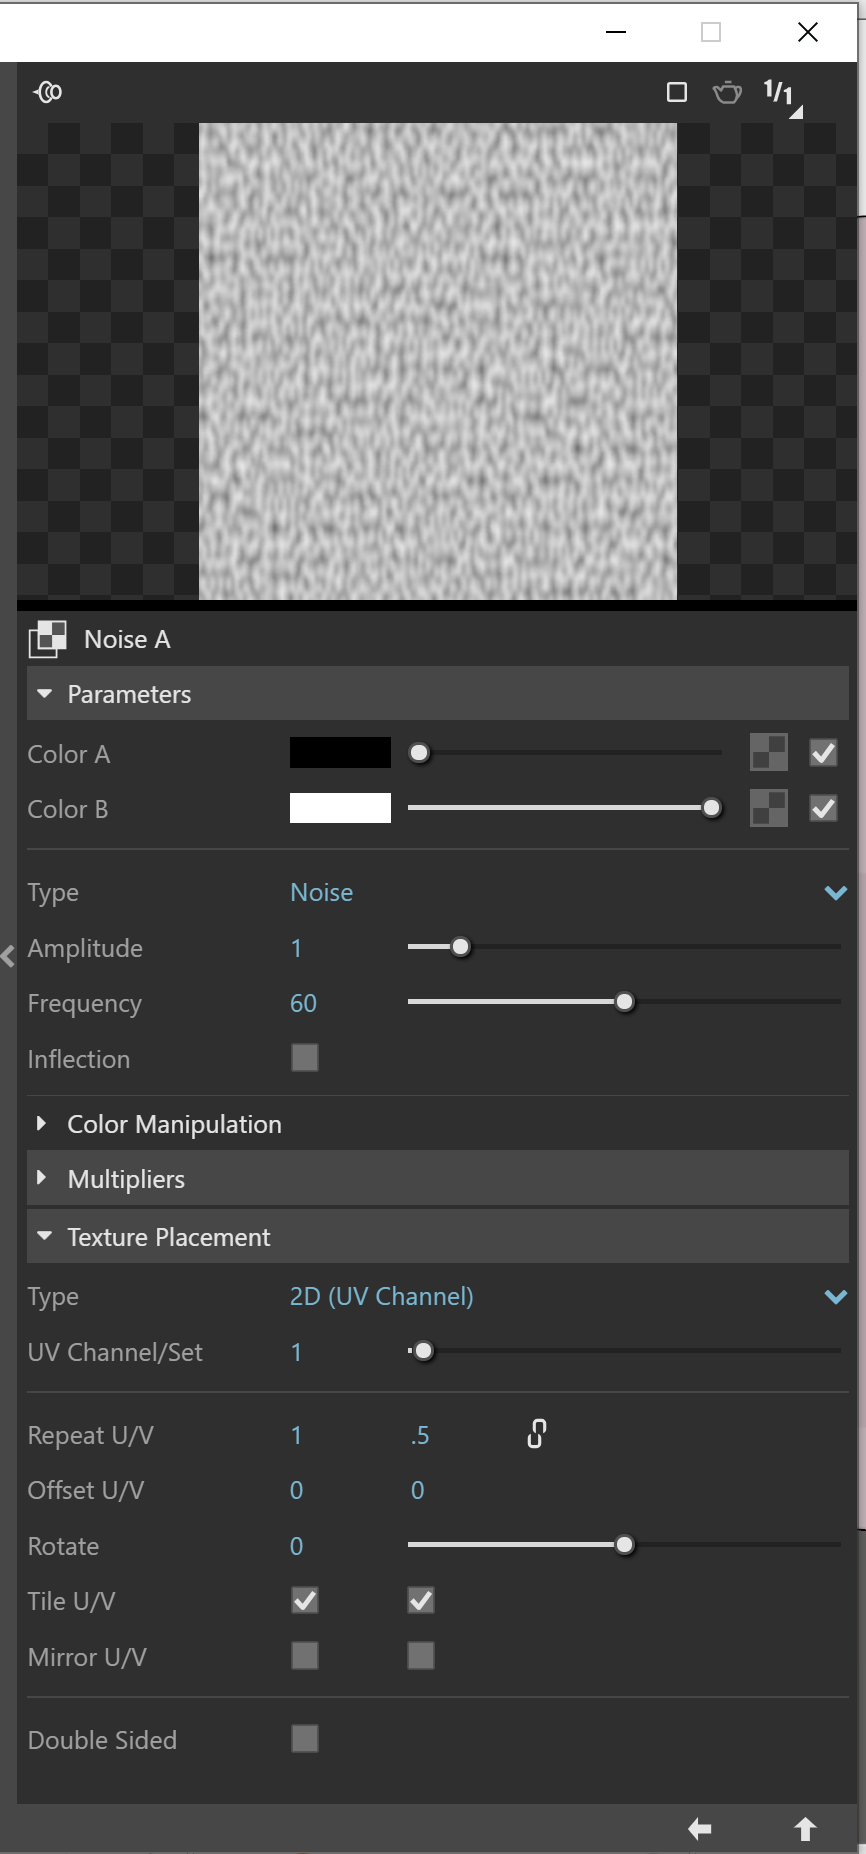
Enable the Bump / Normal Mapping and use the texture slot to add a Procedural Map or Custom bitmap. You can get really good result with the builtin textures, so take your time and try them out. We can control the strength of the bump by adjusting the amount value.

Here are a few examples of textured glass using Bump Maps along with some of the tips shared above.


In case anything was unclear on this Tutorial I hope the Video Tutorial below will do better justice.
Conclusion
I hope these tips helped and you can see how you can easily create different types of glass on your own. There are more setting that can improve an add more realism to your materials and I’ll leave that to a future post. My final suggestion would be to study the materials on the Vray Custom library and learn how they are composed. Secondly, read the resources page on the chaos group website, every single bit of information is listed there for your learning benefits.
Finally, be sure to save these materials and create your library. Nothing better than having your own unique set of materials ready to use.
Thanks for checking out part One, In part two I hope to go into more detail on how to make the materials above more realistic.
Thank You